티스토리 뷰
간단하게 Json을 보여주며 GET, POST, PUT, DELETE를 보여주는 예제입니다.
시작하기
먼저 값을 가공해주는 Data클래스인 UserInfo클래스를 만들겠습니다.
// entity/UserInfo.kt

data class UserInfo(
    val id: String,
    var name: String,
    var phone: String,
    var address: String
)
그리고 유저 정보를 전달해주는 컨트롤러의 기본 세팅입니다.
아직 DB와 연결하지 않았기 때문에 전과 같이 @EnableAutoConfiguration을 추가하였습니다.
// controller/UserController.kt

@RestController
@EnableAutoConfiguration(exclude = [DataSourceAutoConfiguration::class])
class UserController {

}
UserController 작성하기
먼저 user 정보를 key, value 형태로 저장할 userMap을 Map으로 만들어줍니다.
private val userMap: MutableMap<String, UserInfo> = mutableMapOf()
그리고 userMap에 3가지 초기값을 주었습니다.
@PostConstruct
fun init() {
    userMap["1"] = UserInfo("1", "임리프", "111-1111", "광주")
    userMap["2"] = UserInfo("2", "리프", "222-2222", "서울")
    userMap["3"] = UserInfo("3", "임태", "333-3333", "판교")
}
GET
데이터를 전달받을 때 사용하는 GET입니다.
@GetMapping(path = ["/user/{id}"])
fun getUserInfo(@PathVariable("id") id: String) = userMap[id]

@GetMapping(path = ["user/all"])
fun getUserInfoAll() = ArrayList<UserInfo>(userMap.values)
위와 같이 작성을 하고 실행을 한 뒤에
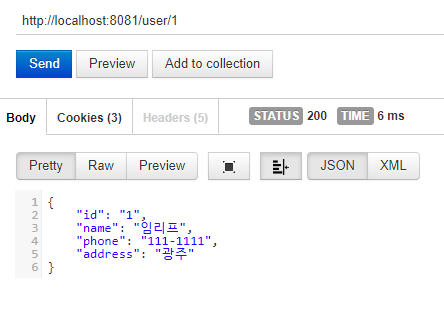
http://localhost:8081/user/1 을 입력하면 원하는 번호의 정보만 전달받을 수 있고
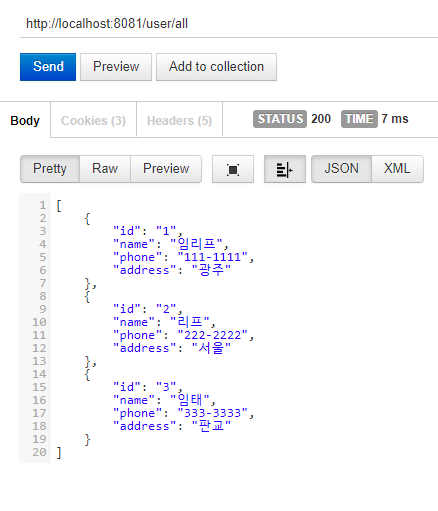
http://localhost:8081/user/all 을 입력하면 전체를 전달받습니다.
POST
데이터를 수정할 수 있는 POST입니다.
@PostMapping(path = ["/user/{id}"])
fun postUserInfo(@PathVariable("id") id: String, @RequestParam("name") name: String, @RequestParam("phone") phone: String, @RequestParam("address") address: String) {

    val userInfo = userMap[id]
    userInfo?.name = name
    userInfo?.phone = phone
    userInfo?.address = address
}
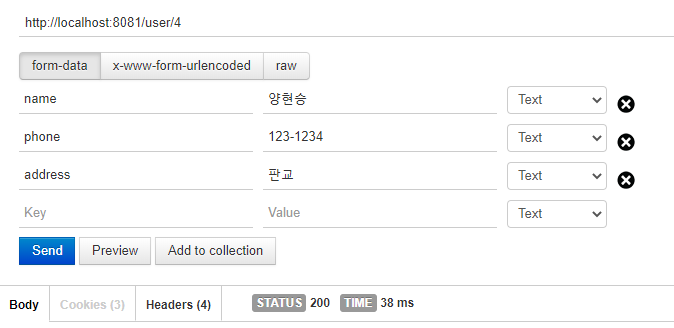
http://localhost:8081/user/3 으로 아래와 같이 POST를 보내면
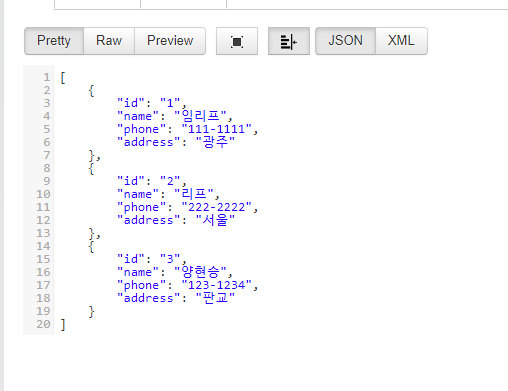
http://localhost:8081/user/all 을 통해 값이 변경된 것을 확인할 수가 있습니다.
PUT
데이터를 넣어주는 PUT입니다.
@PutMapping(path = ["/user/{id}"])
fun putUserInfo(@PathVariable("id") id: String, @RequestParam("name") name: String, @RequestParam("phone") phone: String, @RequestParam("address") address: String) {

    val userInfo = UserInfo(id, name, phone, address)
    userMap[id] = userInfo
}
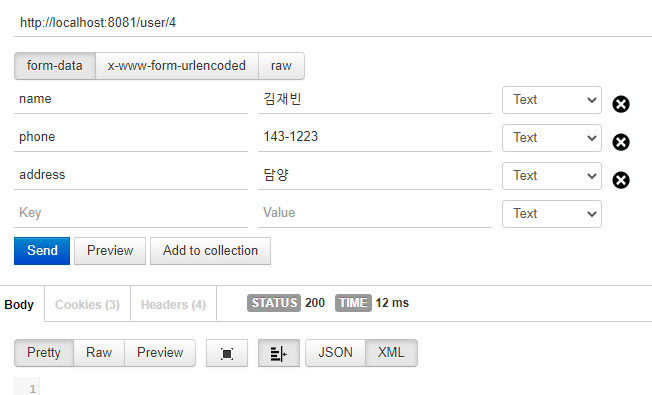
http://localhost:8081/user/4 으로 아래와 같이 PUT을 보내주면
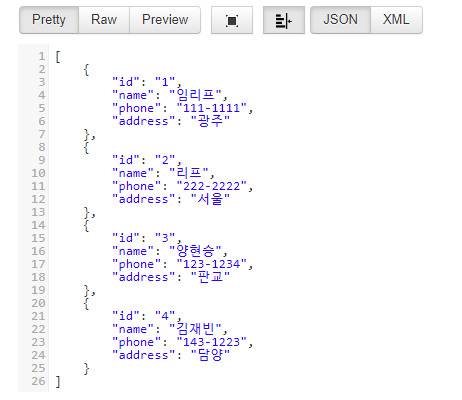
http://localhost:8081/user/all 을 통해 값이 추가된 것을 확인할 수가 있습니다.
DELETE
값을 삭제해주는 DELETE입니다.
@DeleteMapping(path = ["/user/{id}"])
fun deleteUserInfo(@PathVariable("id") id: String) = userMap.remove(id)
http://localhost:8081/user/4 으로 DELETE을 보내주면
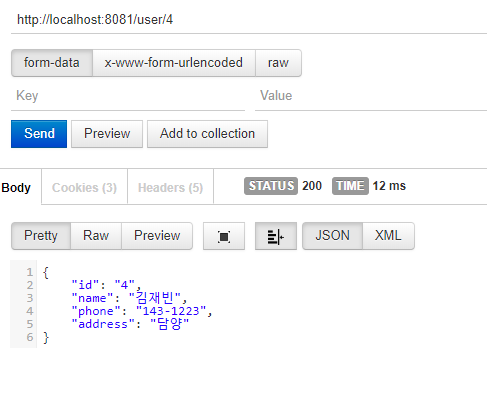
http://localhost:8081/user/all 을 통해 값이 삭제된 것을 확인할 수가 있습니다.
예제 코드
https://github.com/Im-Tae/Blog_Example/tree/master/SpringBoot/2
'알려주는 이야기 > 스프링 부트' 카테고리의 다른 글
| Spring Boot - Http 상태 처리 (0) | 2020.09.08 |
|---|---|
| Spring Boot - 서비스 레이어로 코드 중복, 결합 제거 (0) | 2020.09.08 |
| @PathVariable, @RequestParam (0) | 2020.09.08 |
| @RestController (0) | 2020.09.08 |
| 코틀린을 사용한 스프링부트로 Rest Api 만들기 - 1 (0) | 2020.06.05 |
