티스토리 뷰
스프링부트란 스프링보다 쉽고 간단하게 사용할 수 있도록 하기 위해 나온 프레임워크입니다.
시작하기
스프링부트 프로젝트는 간단하게 만들 수 있습니다.
사이트 에서 만들기
위 사이트에 접속한 후

사진과 같이 세팅을 맞춰주면 됩니다.
아래는 세팅이 맞춰진 링크입니다.
폴더 압축을 풀고

Open or Import를 하여 gradle로 폴더를 열면됩니다.
IntelliJ에서 만들기
Configure > Plugins > MarketPlace 에서 Spring Boot를 검색 후 설치해줍니다.

Spring Initializr를 클릭 후 Next를 누릅니다.

Type은 gradle로 맞추고 언어는 Kotlin으로 바꿉니다.

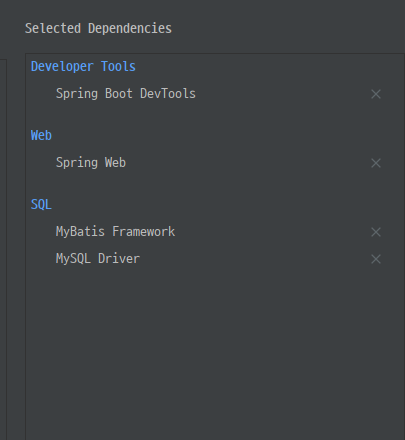
다음으로 넘어가서 Dependencies 설정을 위와 같이 해줍니다.

원하는 폴더 위치와 이름을 지정해주고 생성을 클릭합니다.
스프링 부트로 첫 서버 만들기
빌드가 되면 서버 테스트를 하기 위해서 IndexController.kt 라는 클래스를 생성하겠습니다.
클라이언트가 요청을 하면 기본적으로 작업을 해주기 때문에 Controller라고 이름을 붙였습니다.

// IndexController.kt

import org.springframework.web.bind.annotation.GetMapping
import org.springframework.web.bind.annotation.RestController

@RestController
class IndexController {

    @GetMapping(path = ["/"])
    fun index() = "Hello Spring!"
}

바로 빌드를 하게 되면 아래와 같은 에러가 발생하게 됩니다.
Consider the following:
	If you want an embedded database (H2, HSQL or Derby), please put it on the classpath.
	If you have database settings to be loaded from a particular profile you may need to activate it (no profiles are currently active).

2020-06-05 12:18:40.986  WARN 31664 --- [  restartedMain] o.s.boot.SpringApplication               : Unable to close ApplicationContext

org.springframework.beans.factory.BeanCreationException: Error creating bean with name 'org.springframework.boot.autoconfigure.admin.SpringApplicationAdminJmxAutoConfiguration': Initialization of bean failed; nested exception is org.springframework.beans.factory.BeanCreationException: Error creating bean with name 'org.springframework.transaction.annotation.ProxyTransactionManagementConfiguration': Initialization of bean failed; nested exception is org.springframework.beans.factory.NoSuchBeanDefinitionException: No bean named 'org.springframework.context.annotation.ConfigurationClassPostProcessor.importRegistry' available
...
Dependencies로 데이터베이스를 쓰겠다고 추가해줬지만 정의를 해주지 않아서 뜨는 에러이기 떄문에 아래에 있는 코드를 추가해주면 됩니다.
@EnableAutoConfiguration(exclude = [DataSourceAutoConfiguration::class])

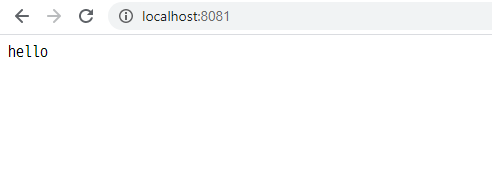
위와 같이 코드를 작성하고 다시 빌드를 하면

서버가 열려 잘 동작을 하는 것을 볼 수 있습니다.
***************************
APPLICATION FAILED TO START
***************************

Description:

Web server failed to start. Port 8080 was already in use.

Action:

Identify and stop the process that's listening on port 8080 or configure this application to listen on another port.
만약 위와 같은 에러가 발생했다면,
resources > application.properties에서 아래와 같이 충돌이 없는 원하는 포트번호를 바꿔주면 됩니다.
server.port= 8081
예제 코드
https://github.com/Im-Tae/Blog_Example/tree/master/SpringBoot/1
'알려주는 이야기 > 스프링 부트' 카테고리의 다른 글
| Spring Boot - Http 상태 처리 (0) | 2020.09.08 |
|---|---|
| Spring Boot - 서비스 레이어로 코드 중복, 결합 제거 (0) | 2020.09.08 |
| @PathVariable, @RequestParam (0) | 2020.09.08 |
| @RestController (0) | 2020.09.08 |
| 코틀린을 사용한 스프링부트로 Rest Api 만들기 - 2 (0) | 2020.06.19 |
