티스토리 뷰
Do
세계의 날씨 정보를 제공하는 API 중 OpenWeatherMap이 있습니다.
무료로 제공되는 API이고 REST 방식으로 제공됩니다.
RxJava를 사용하여 데이터를 가져올 것입니다.
Api Key 받기
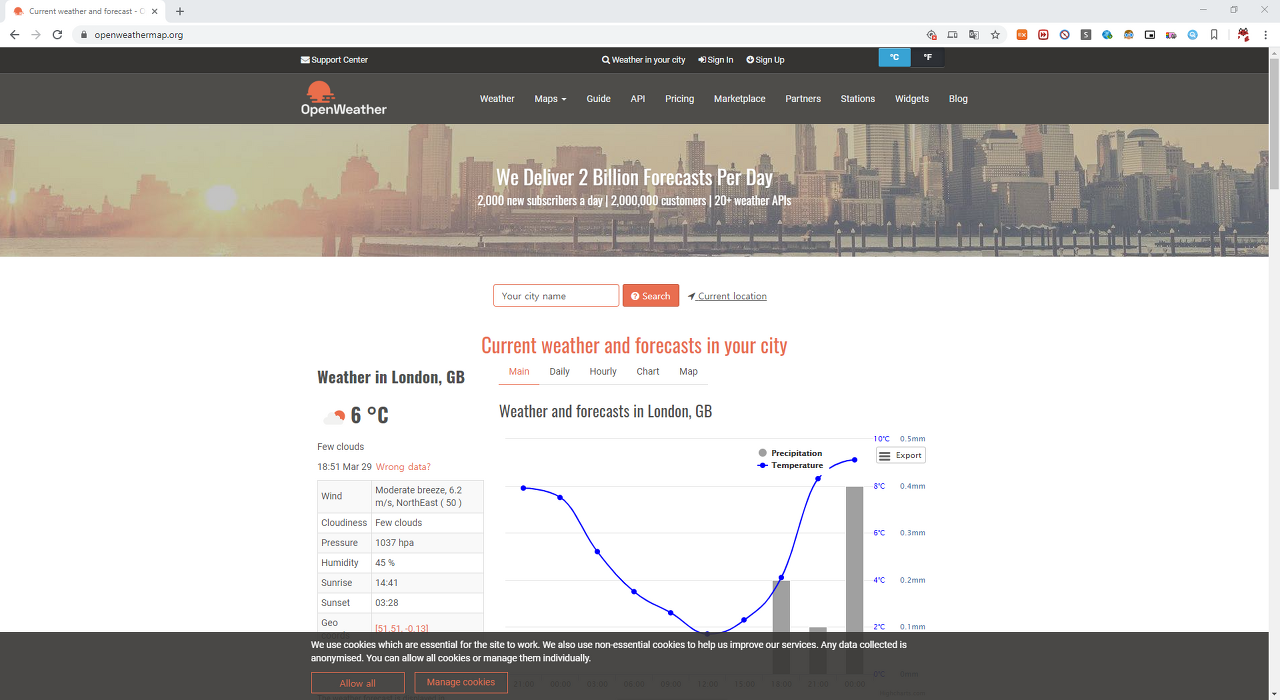
API Key 생성을 위해 OpenWeatherMap 홈페이지에 접속한 후 중간 위의 Sign UP을 눌러 회원 가입합니다.

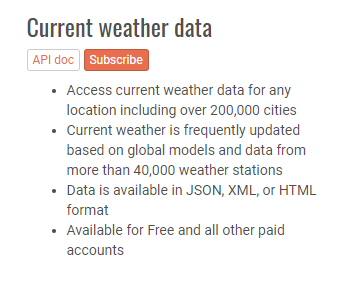
회원 가입을 완료하면 API 메뉴를 누른 후, Cueent weather data에 있는 Subscribe를 누릅니다.

Free에 있는 Get Api key and Start를 누른 후 맨 위 중간에 있는 Sign in을 누릅니다.

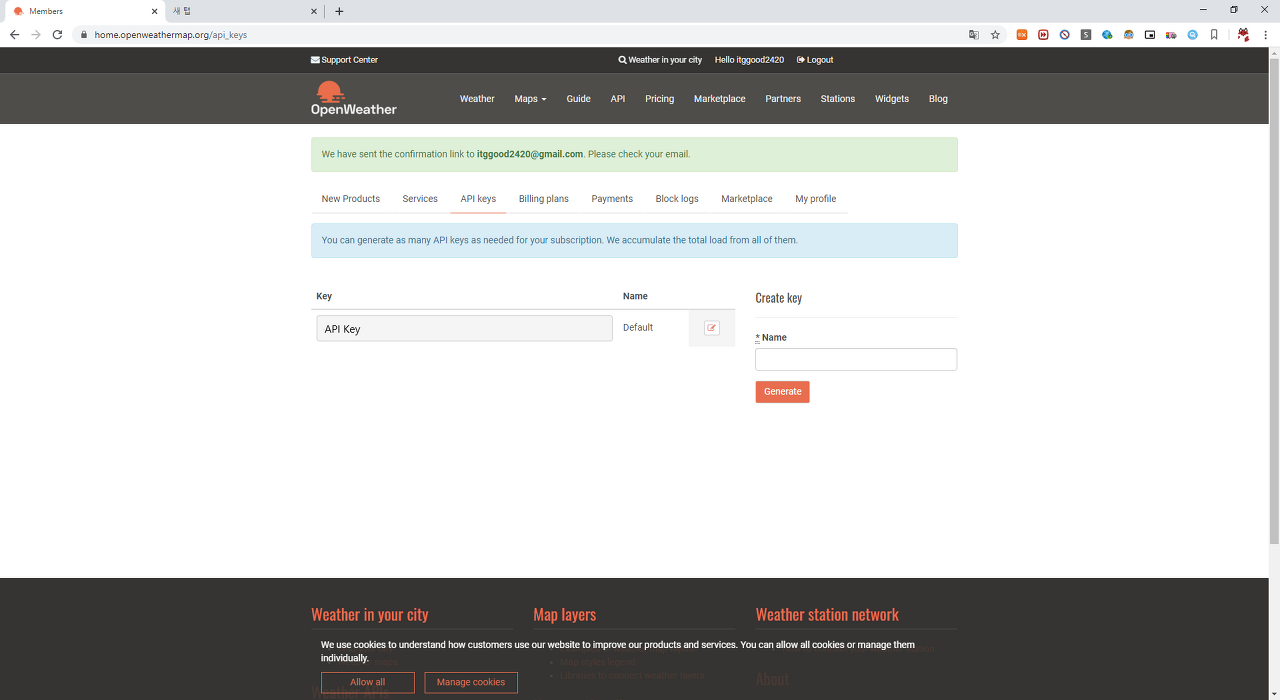
API Keys를 누르면 Default에 API Key 하나가 생긴 것을 볼 수 있습니다.

API 준비가 끝났으니 이제 간단한 REST API 호출을 이용해 특정 도시의 현재 날씨를 얻어올 것입니다.
OpenWeather Json 구조
제공되는 JSON 데이터는 아래와 같습니다.
{
    "coord":{
        "lon":-0.13,
        "lat":51.51
    },
    "weather":[
        {
            "id":801,
            "main":"Clouds",
            "description":"few clouds",
            "icon":"02d"
        }
    ],
    "base":"stations",
    "main":{
        "temp":279.49,
        "feels_like":272.57,
        "temp_min":278.15,
        "temp_max":280.93,
        "pressure":1037,
        "humidity":45
    },
    "visibility":10000,
    "wind":{
        "speed":6.2,
        "deg":50,
        "gust":11.8
    },
    "clouds":{
        "all":20
    },
    "dt":1585476180,
    "sys":{
        "type":1,
        "id":1414,
        "country":"GB",
        "sunrise":1585460504,
        "sunset":1585506501
    },
    "timezone":3600,
    "id":2643743,
    "name":"London",
    "cod":200
}
JSON 데이터를 통해 현재 온도, 도시 이름, 국가 이름을 얻어올 것입니다.
코드 작성
입력
import common.CommonUtils
import common.Log
import common.OkHttpHelper
import io.reactivex.Observable
import io.reactivex.schedulers.Schedulers
import java.util.regex.Pattern

class OpenWeatherMapV1 {
    private val URL = "http://api.openweathermap.org/data/2.5/weather?q=London&appid="
    private val API_KEY = "여기에 API KEY"

    fun run() {
        val source = Observable.just(URL + API_KEY)
            .map(OkHttpHelper()::getWithLog)
            .subscribeOn(Schedulers.io())

        val temperature = source.map(this::parseTemperature)
        val city = source.map(this::parseCityName)
        val country = source.map(this::parseCountry)

        CommonUtils.start()

        Observable.concat(temperature, city, country)
            .observeOn(Schedulers.newThread())
            .subscribe { data -> Log.it(data) }
        CommonUtils.sleep(3000)

    }

    private fun parseTemperature(json: String): String = parse(json, "\"temp\":[0-9]*.[0-9]*")

    private fun parseCityName(json: String): String = parse(json, "\"name\":\"[a-zA-Z]*\"")

    private fun parseCountry(json: String): String = parse(json, "\"country\":\"[a-zA-Z]*\"")

    private fun parse(json: String, regex: String): String {
        val pattern = Pattern.compile(regex)
        val match = pattern.matcher(json)

        if (match.find()) return match.group()

        return "N/A"
    }
}

fun main() {
    val demo = OpenWeatherMapV1()
    demo.run()
}
출력
RxCachedThreadScheduler-1 | debug = OkHttp call URL = http://api.openweathermap.org/data/2.5/weather...
RxNewThreadScheduler-1 | 438 | value = "temp":279.63
RxCachedThreadScheduler-2 | debug = OkHttp call URL = http://api.openweathermap.org/data/2.5/weather...
RxNewThreadScheduler-1 | 559 | value = "name":"London"
RxCachedThreadScheduler-1 | debug = OkHttp call URL = http://api.openweathermap.org/data/2.5/weather...
RxNewThreadScheduler-1 | 680 | value = "country":"GB"
위 코드에 대한 설명은 아래와 같습니다.
- temperature, city, country 각각에 map 함수를 호출하여 파싱 한다.
- 간단한 형태로 이루어져 있어서 정규 표현식을 사용했다.
- 파싱 해서 얻은 각각의 정보를 취합하기 위해서 concat 함수를 호출했다.
- subscribeOn(Schedulers.io())를 통해 IO 스케줄러에서 REST API 호출을 했다.
- 호출 결과는 observeOn(Schedulers.newThread())를 통해 뉴 스레드 스케줄러에서 실행했다.
정규 표현식을 사용했지만, 복잡한 내용을 파싱 할 때는 Gson 등의 라이브러리를 활용하는 것이 좋습니다.
결과적으로 보면 원하는 정보가 나왔지만 REST API 호출이 3번 발생한 것을 볼 수 있습니다.
즉, 원하는 정보가 10 개였다면 10번의 API를 호출해야 되니 굉장히 비효율적인 것을 볼 수 있습니다.
위에서 쓰인 OkHttpHelper클래스의 getWithLog 메서드의 코드는 아래와 같습니다.
입력
@Throws(IOException::class)
    fun getWithLog(url: String): String {
        Log.d("OkHttp call URL = $url")
        return get(url)
    }
아래는 위의 코드를 개선한 코드입니다.
입력
import common.CommonUtils
import common.Log
import common.OkHttpHelper
import io.reactivex.Observable
import io.reactivex.schedulers.Schedulers
import java.util.regex.Pattern

class OpenWeatherMapV2 {
    private val URL = "http://api.openweathermap.org/data/2.5/weather?q=London&appid="
    private val API_KEY = "여기에 API KEY"

    fun run() {
        val source = Observable.just(URL + API_KEY)
            .map(OkHttpHelper()::getWithLog)
            .subscribeOn(Schedulers.io())
            .share()
            .observeOn(Schedulers.newThread())

        source.map(this::parseTemperature).subscribe { data -> Log.it(data) }
        source.map(this::parseCityName).subscribe { data -> Log.it(data) }
        source.map(this::parseCountry).subscribe { data -> Log.it(data) }

        CommonUtils.sleep(3000)
    }

    private fun parseTemperature(json: String): String = parse(json, "\"temp\":[0-9]*.[0-9]*")

    private fun parseCityName(json: String): String = parse(json, "\"name\":\"[a-zA-Z]*\"")

    private fun parseCountry(json: String): String = parse(json, "\"country\":\"[a-zA-Z]*\"")

    private fun parse(json: String, regex: String): String {
        val pattern = Pattern.compile(regex)
        val match = pattern.matcher(json)

        if (match.find()) return match.group()

        return "N/A"
    }
}

fun main() {
    val demo = OpenWeatherMapV2()
    demo.run()
}
출력
RxCachedThreadScheduler-1 | debug = OkHttp call URL = http://api.openweathermap.org/data/2.5/weather...
RxNewThreadScheduler-1 | value = "temp":279.46
RxNewThreadScheduler-2 | value = "name":"London"
RxNewThreadScheduler-3 | value = "country":"GB"
ConnectableObservable 클래스를 사용하였습니다.
ConnectableObservable 클래스는 1개의 Observable을 여러 구독자가 공유하는 방식으로 차가운 Observable을 뜨거운 Observable로 변환해줍니다.
여기에서는 ConnectableObservable 클래스의 publish 함수와 refCount 함수를 활용했습니다. 소스 코드에 보이지 않는 이유는 두 함수를 합하면 Observable의 share 함수가 되기 때문입니다.
map 함수와 subscribe 함수를 차례로 호출했습니다. subscribe 함수를 호출하면 Observable의 데이터가 다시 발행되기 때문에 서버의 REST API를 호출하지 않아도 됩니다.
'알려주는 이야기 > RxJava' 카테고리의 다른 글
| 24. RxJava 예외 처리 (0) | 2020.08.14 |
|---|---|
| 23. RxJava 디버깅 (0) | 2020.07.23 |
| 21. RxJava - observeOn 함수 (0) | 2020.07.22 |
| 20. RxJava - 콜백 지옥 (0) | 2020.07.21 |
| 19. RxJava - 스케줄러 종류 (0) | 2020.07.21 |
