티스토리 뷰
구글 API 발급
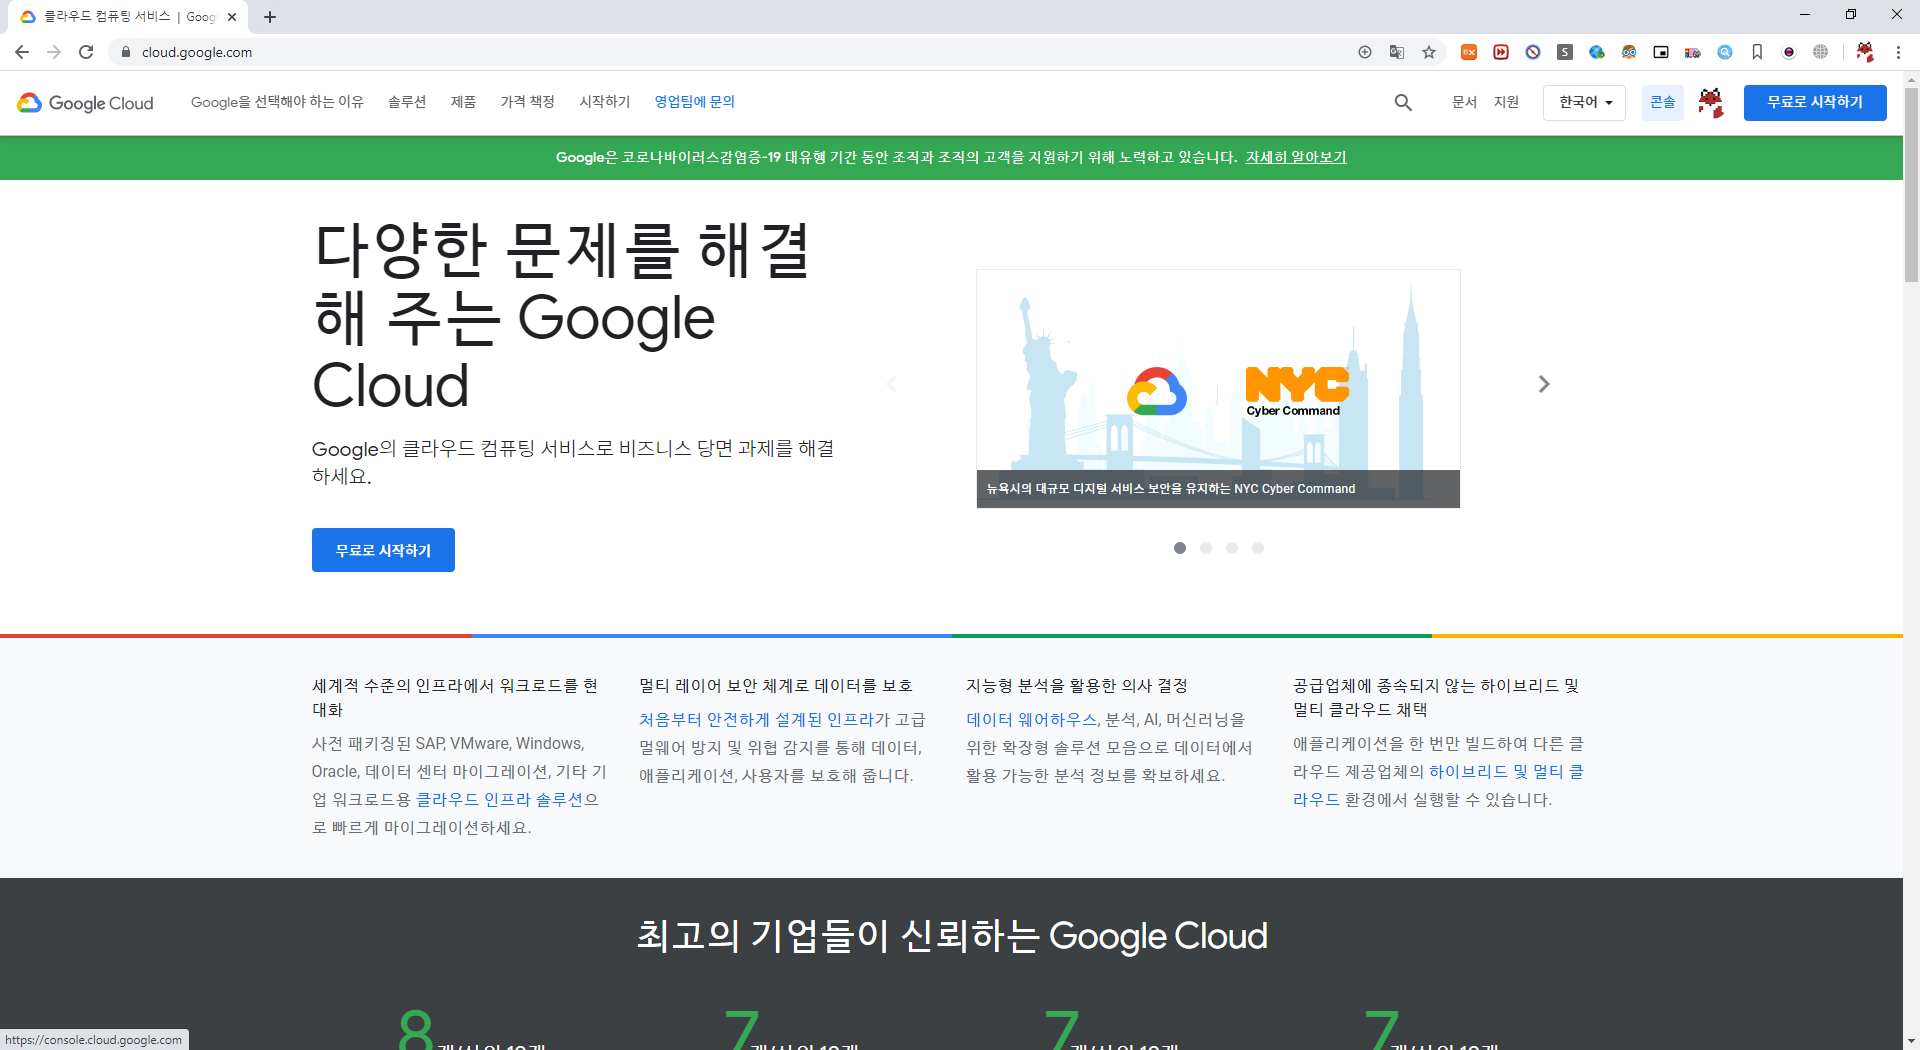
https://cloud.google.com/ 에 접속합니다.
로그인을 한 후에 상단에 있는 콘솔 버튼을 눌러줍니다.
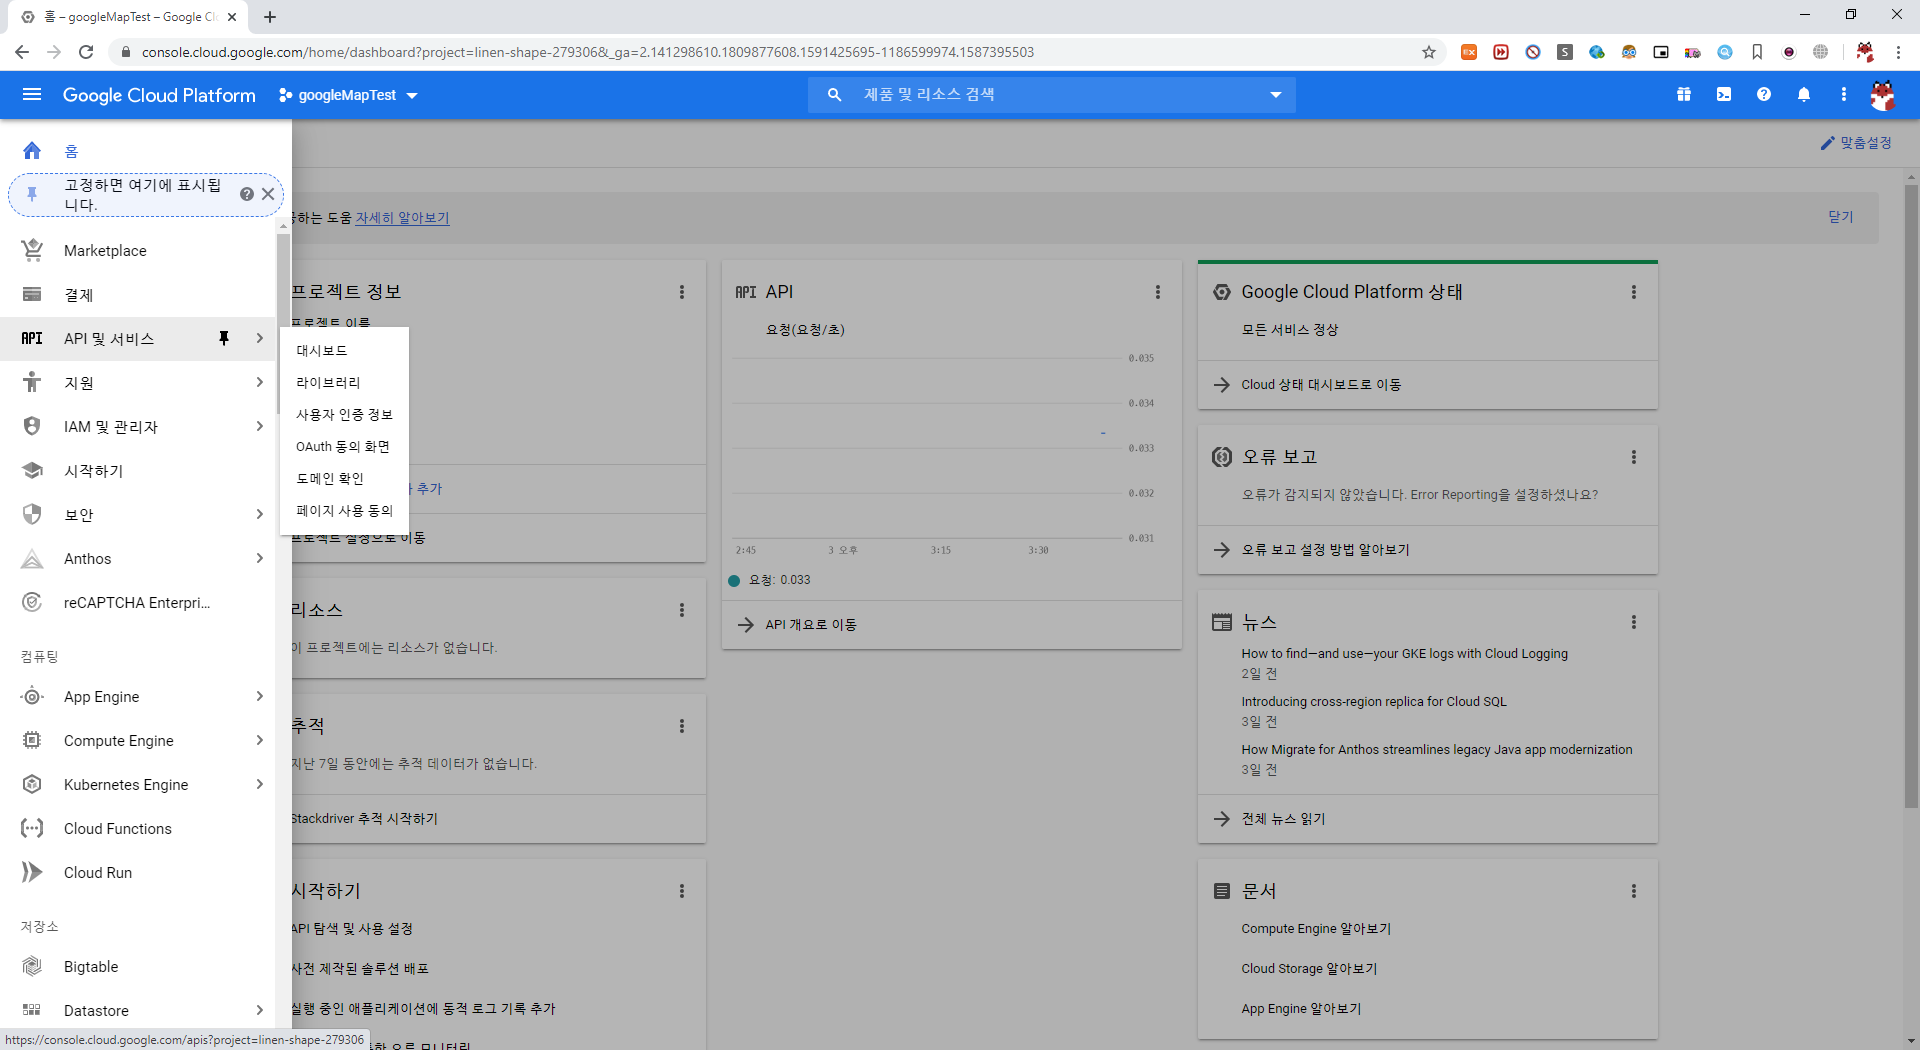
그리고 API 및 서비스에 들어갑니다
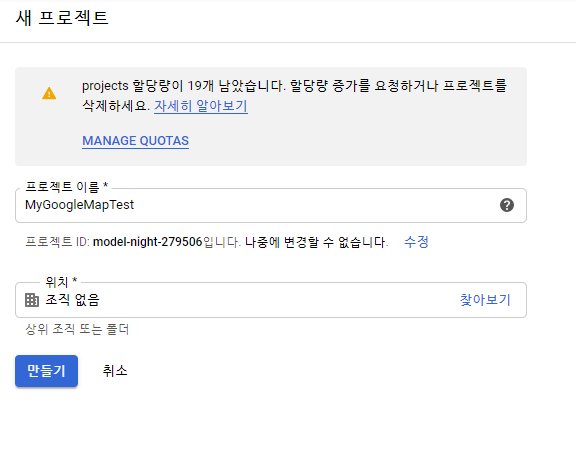
그리고 프로젝트를 생성해줍니다.

상단에 있는 API 및 서비스 사용 설정을 누르고
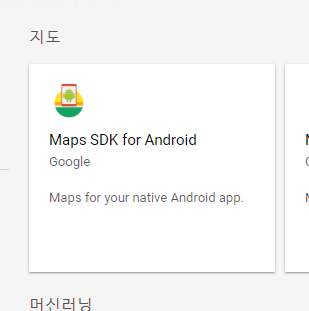
Maps SDK for Android를 선택해줍니다.
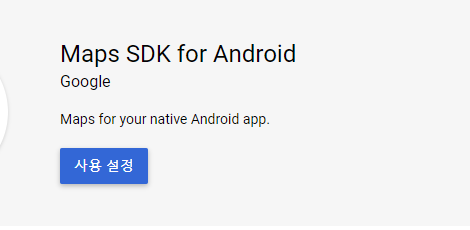
사용 설정 버튼을 누른 뒤에
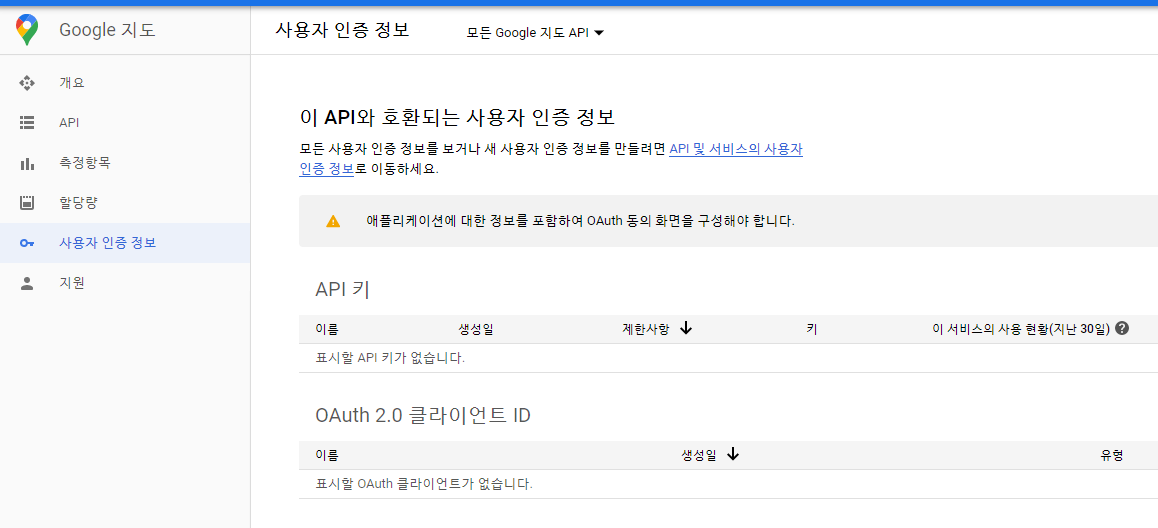
사용자 인증 정보로 와서
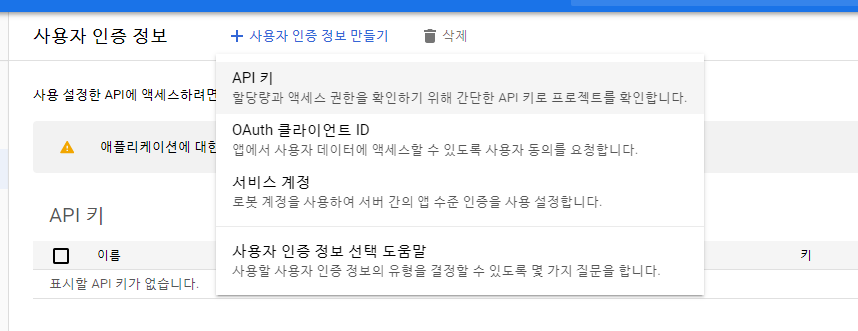
API 키를 생성해줍니다.
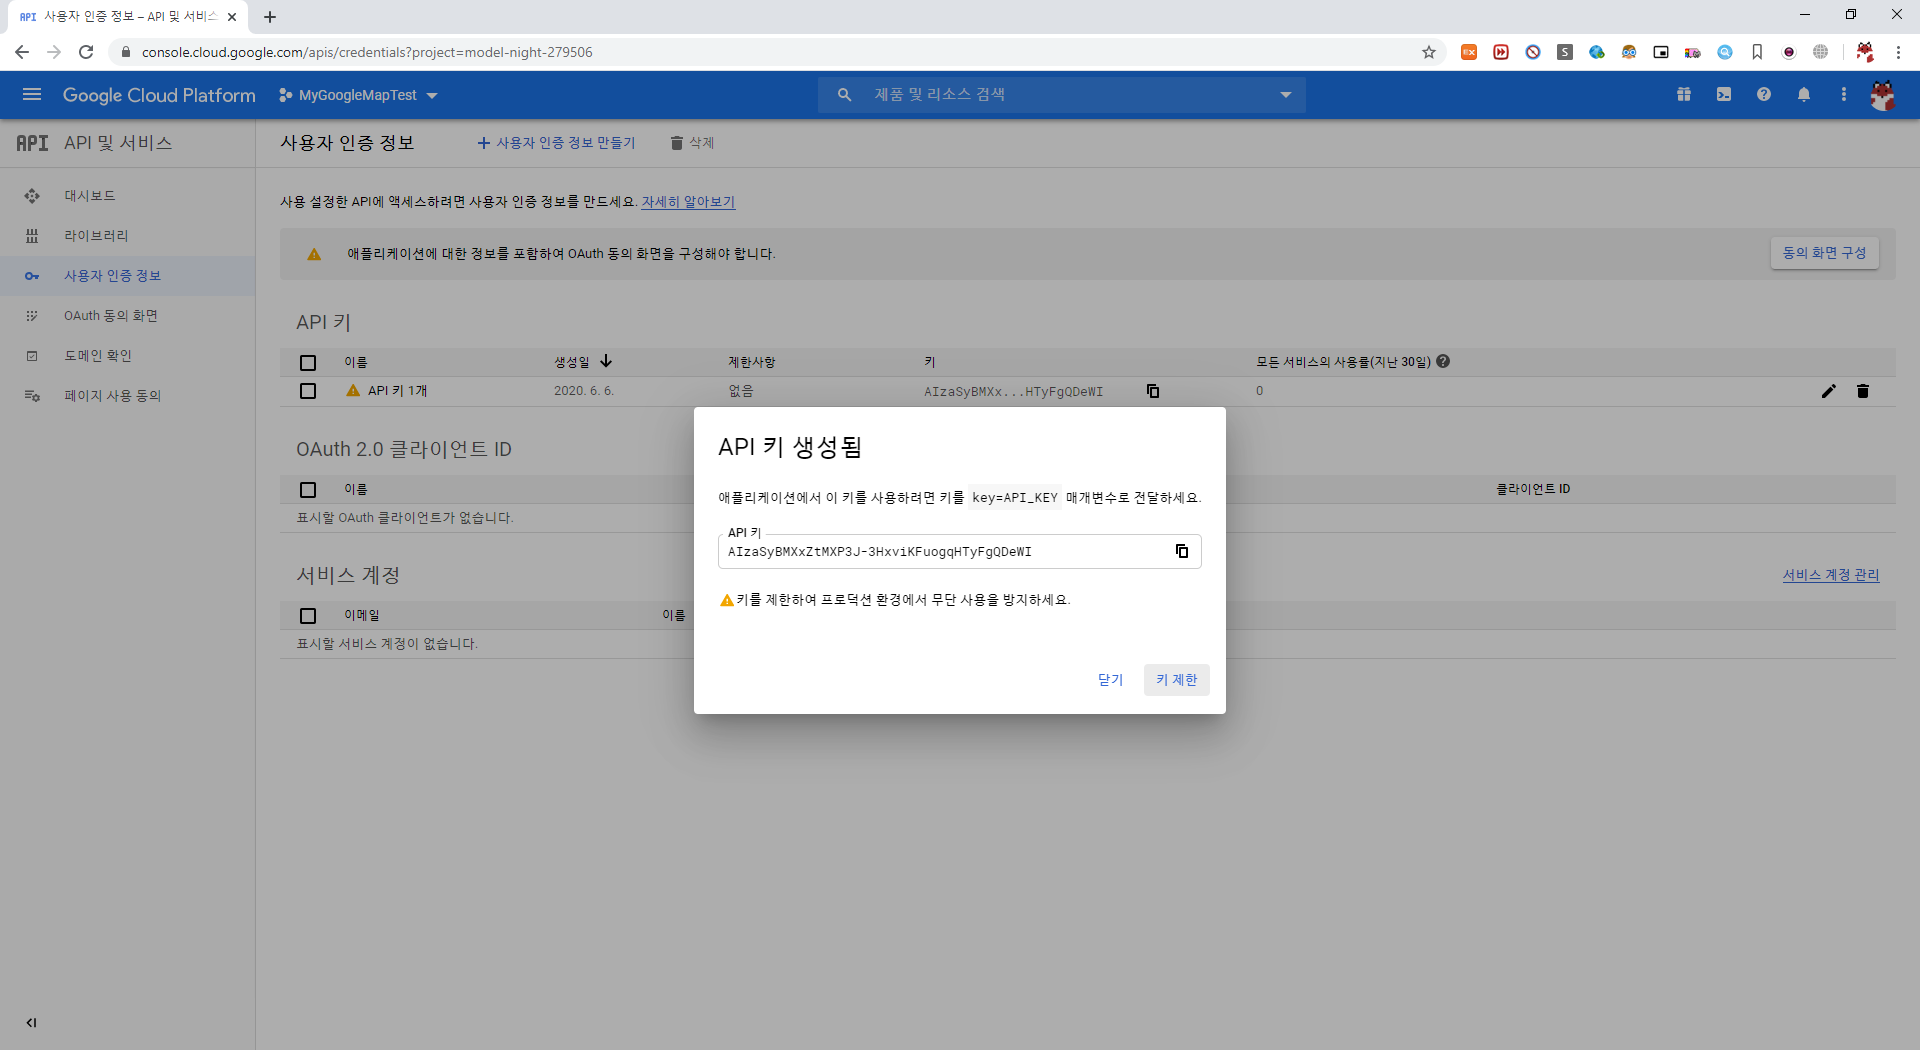
키 제한을 클릭하여 아래와 같이 제한 설정을 해줍니다.
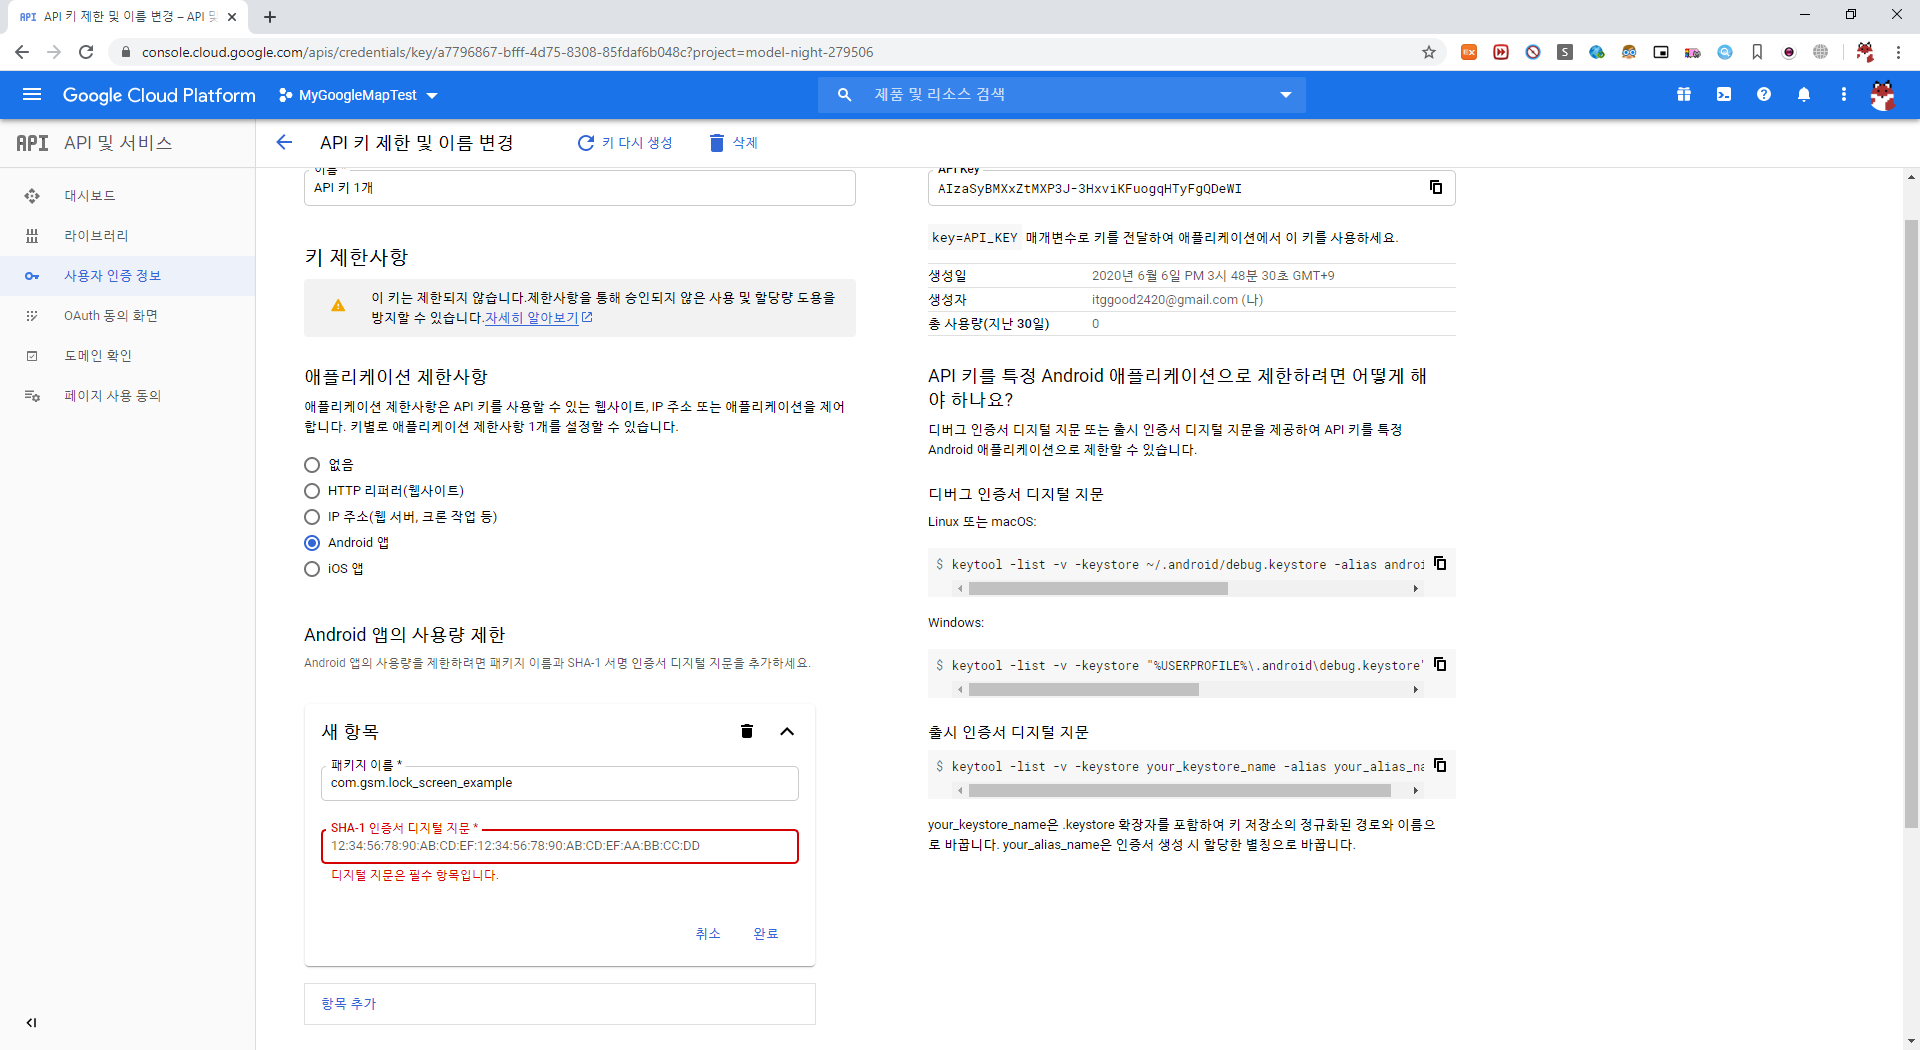
SHA-1 인증키 발급받기
SHA-1 인증키는 아래와 같이 발급받을 수 있습니다.
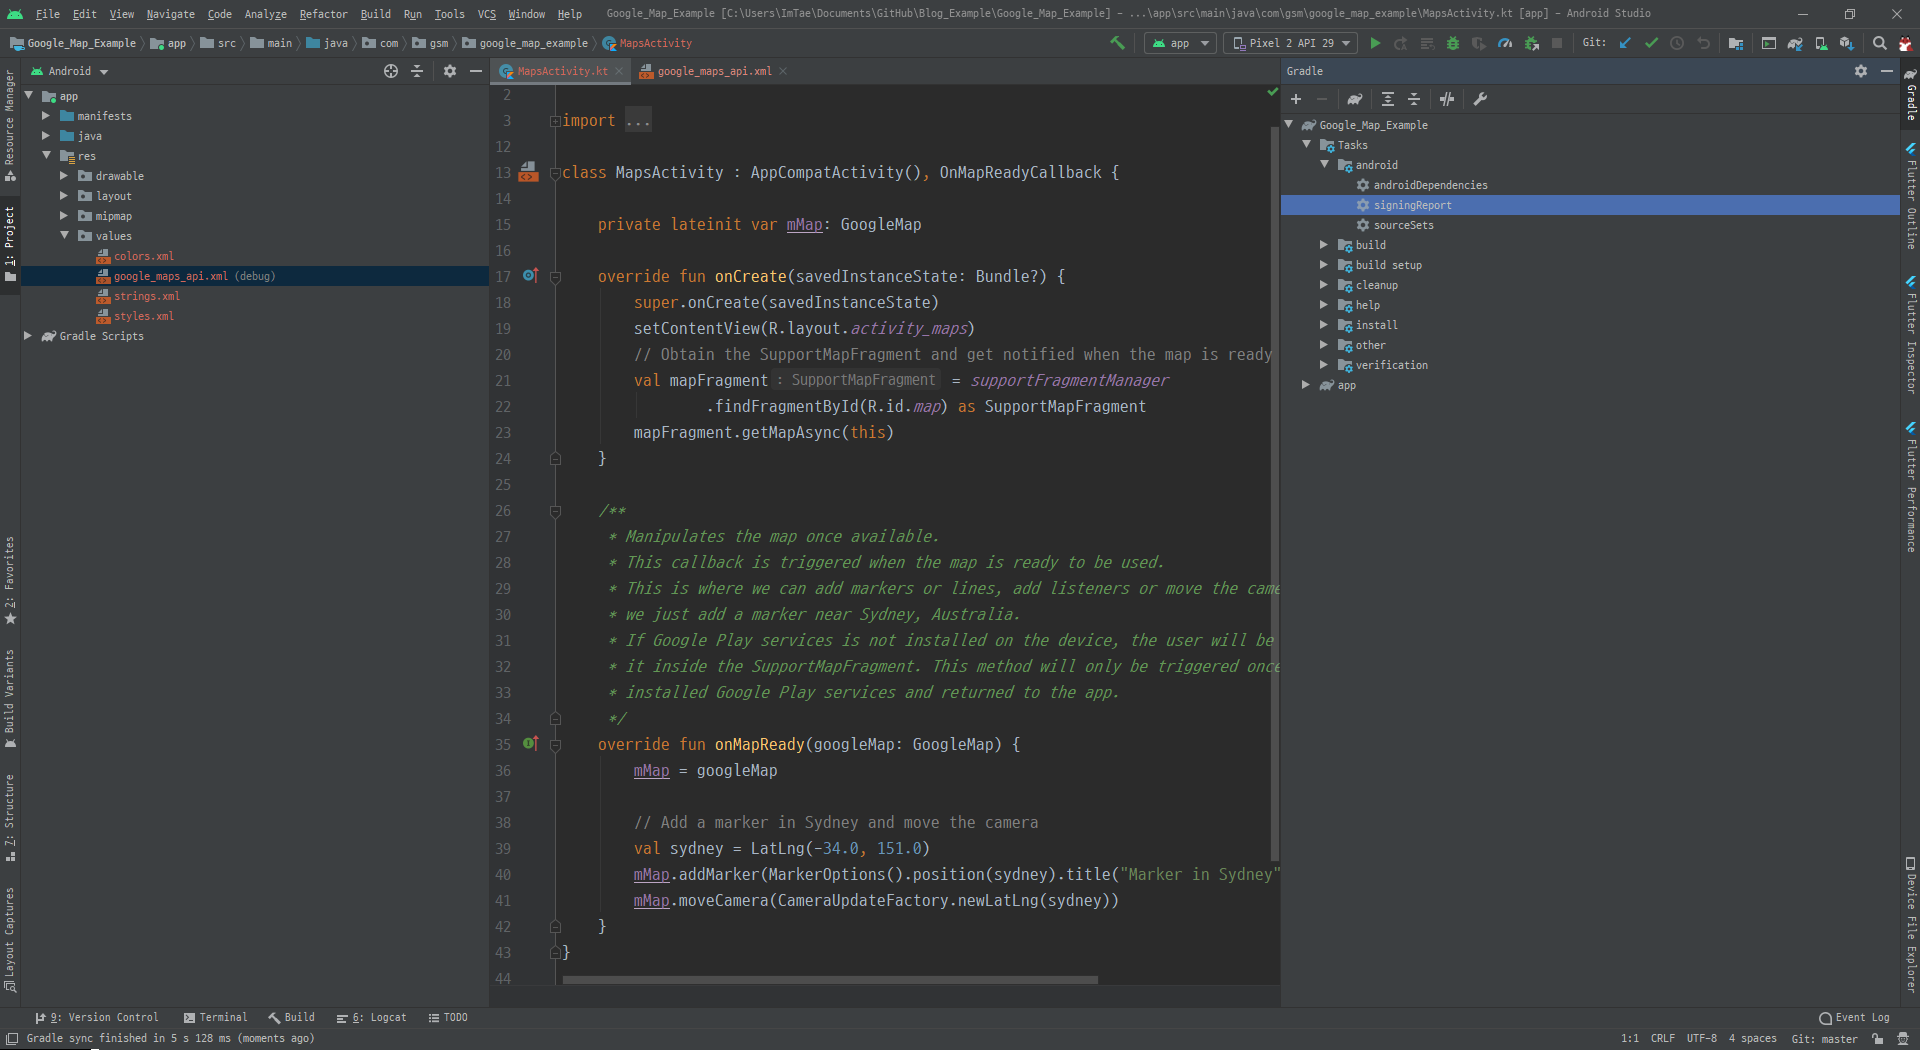
Gradle > Tasks > android > signingReport를 더블 클릭하면
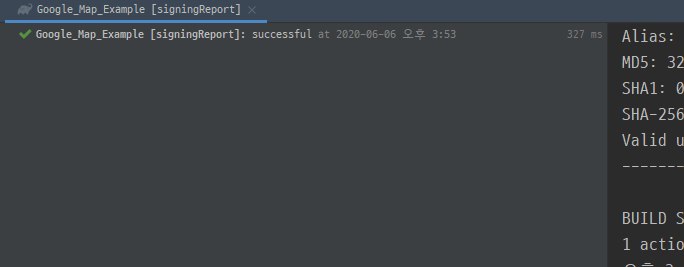
위와 같이 발급이 되고 복사하여 붙여 넣으시면 됩니다.
구글 맵 적용
먼저 build.gradle에 아래 코드를 추가해줍니다.
implementation 'com.google.android.gms:play-services-maps:16.0.0'
implementation 'com.google.maps.android:android-maps-utils:0.5+'

implementation 'com.android.support:cardview-v7:28.0.0'
implementation 'com.android.support:design:28.0.0'
그리고 AndroidManifest를 아래와 같이 수정해줍니다.
<?xml version="1.0" encoding="utf-8"?>
<manifest xmlns:android="http://schemas.android.com/apk/res/android"
    package="com.gsm.google_map_example">

    <uses-permission android:name="android.permission.ACCESS_COARSE_LOCATION"/>
    <uses-permission android:name="android.permission.ACCESS_FINE_LOCATION"/>

    <application
        android:allowBackup="true"
        android:icon="@mipmap/ic_launcher"
        android:label="@string/app_name"
        android:roundIcon="@mipmap/ic_launcher_round"
        android:supportsRtl="true"
        android:theme="@style/AppTheme">

        <meta-data android:name="com.google.android.geo.API_KEY"
            android:value="여기에 API 키"/>

        <meta-data android:name="com.google.android.gms.version"
            android:value="@integer/google_play_services_version"/>

        <uses-library android:name="org.apache.http.legacy"
            android:required="false"/>

        <activity android:name=".MainActivity">
            <intent-filter>
                <action android:name="android.intent.action.MAIN" />

                <category android:name="android.intent.category.LAUNCHER" />
            </intent-filter>
        </activity>

    </application>
</manifest>
안드로이드에서 위치를 측정할 때 2가지로 봅니다.
하나는 네트워크 위치로 오차는 크지만 배터리가 적게 사용되고 실내에서도 측정이 가능하고,
다른 하나는 GSP 센서로 오차가 적은 대신에 배터리 사용이 많아지고 실내에서 측정이 불가능합니다.
그래서 둘이 보완하여 사용을 해야 합니다.
<uses-permission android:name="android.permission.ACCESS_COARSE_LOCATION"/>는 네트워크로만 위치를 측정하는 것이고
<uses-permission android:name="android.permission.ACCESS_FINE_LOCATION"/>는 GPS 센서를 사용하는 것입니다.
<uses-library android:name="org.apache.http.legacy"
            android:required="false"/>
위의 코드는 안드로이드 파이부터 새롭게 추가된 코드입니다.
구글 맵이 포함된 레이아웃 만들기
아래와 같이 작성해줍니다.
// activity_main.xml

<?xml version="1.0" encoding="utf-8"?>
<androidx.constraintlayout.widget.ConstraintLayout xmlns:android="http://schemas.android.com/apk/res/android"
    xmlns:app="http://schemas.android.com/apk/res-auto"
    xmlns:tools="http://schemas.android.com/tools"
    android:layout_width="match_parent"
    android:layout_height="match_parent"
    tools:context=".MainActivity">

    <com.google.android.gms.maps.MapView
        android:id="@+id/mapView"
        android:layout_width="0dp"
        android:layout_height="0dp"
        app:layout_constraintTop_toTopOf="parent"
        app:layout_constraintBottom_toBottomOf="parent"
        app:layout_constraintStart_toStartOf="parent"
        app:layout_constraintEnd_toEndOf="parent"/>

    <com.google.android.material.floatingactionbutton.FloatingActionButton
        android:id="@+id/myLocationButton"
        android:layout_width="wrap_content"
        android:layout_height="wrap_content"
        android:clickable="true"
        android:src="@drawable/ic_my_location_black_24dp"
        app:layout_constraintEnd_toEndOf="parent"
        app:layout_constraintBottom_toBottomOf="parent"
        android:layout_marginEnd="8dp"
        android:layout_marginBottom="8dp"
        app:fabSize="mini"/>

</androidx.constraintlayout.widget.ConstraintLayout>
구글 맵 코드 작성하기
먼저 권한 설정 코드입니다.
class MainActivity : AppCompatActivity() {

    val PERMISSIONS = arrayOf(
        Manifest.permission.ACCESS_COARSE_LOCATION,
        Manifest.permission.ACCESS_FINE_LOCATION)

    val REQUEST_PERMISSION_CODE = 1

    private fun checkPermissions(): Boolean {

        for (permission in PERMISSIONS) {
            if (ActivityCompat.checkSelfPermission(this, permission) != PackageManager.PERMISSION_GRANTED) {
                return false
            }
        }
        return true
    }

    override fun onRequestPermissionsResult(requestCode: Int, permissions: Array<out String>, grantResults: IntArray) {
        super.onRequestPermissionsResult(requestCode, permissions, grantResults)

        initMap()
    }
}
퍼미션 목록중에 권한이 하나라도 없으면 false를 반환합니다.
onCreate 안에 작성할 코드입니다.
class MainActivity : AppCompatActivity() {

override fun onCreate(savedInstanceState: Bundle?) {
        super.onCreate(savedInstanceState)
        setContentView(R.layout.activity_main)

        mapView.onCreate(savedInstanceState)

        if (checkPermissions()) {
            initMap()
        } else {
            ActivityCompat.requestPermissions(this, PERMISSIONS, REQUEST_PERMISSION_CODE)
        }

        myLocationButton.setOnClickListener { onMyLocationButtonClick() }
    }
}
먼저 맵뷰에 onCreate 함수를 호출해주고,
퍼미션을 체크한 후 권한이 있으면 initMap()으로 맵을 초기화 해주고 없으면 권한을 요청하는 코드입니다.
맵을 초기화 해주는 initMap의 코드입니다.
class MainActivity : AppCompatActivity() {

    val DEFAULT_ZOOM_LEVEL = 17f

    val CITY_HALL = LatLng(37.5662952, 126.97794509999994)

    var googleMap: GoogleMap? = null

    @SuppressLint("MissingPermission")
    fun initMap() {
        mapView.getMapAsync {

            googleMap = it

            it.uiSettings.isMyLocationButtonEnabled = false

            when {
                checkPermissions() -> {
                    it.isMyLocationEnabled = true
                    it.moveCamera(CameraUpdateFactory.newLatLngZoom(getMyLocation(), DEFAULT_ZOOM_LEVEL))
                }
                else -> {
                    it.moveCamera(CameraUpdateFactory.newLatLngZoom(CITY_HALL, DEFAULT_ZOOM_LEVEL))
                }
            }
        }
    }
}
getMapAsync는 구글 맵을 불러오는 함수입니다.
구글 맵을 불러온 후에 googleMap = it을 통해 gooleMap 변수에 객체를 저장합니다.
it.uiSettings.isMyLocationButtonEnabled = false현재 위치 이동 버튼 비활성화를 한 뒤에권한을 확인하여 권한이 있을 경우
it.isMyLocationEnabled = true
it.moveCamera(CameraUpdateFactory.newLatLngZoom(getMyLocation(), DEFAULT_ZOOM_LEVEL))
현재 위치를 활성화 해주고, 카메라를 이동해줍니다.
만약 권한이 없다면 지정해둔 서울시청의 위치로 이동을 해줍니다.
현재 위치를 반환해주는 getMyLocation의 코드입니다.
class MainActivity : AppCompatActivity() {

    @SuppressLint("MissingPermission")
    fun getMyLocation(): LatLng {

        val locationProvider: String = LocationManager.GPS_PROVIDER

        val locationManager = getSystemService(Context.LOCATION_SERVICE) as LocationManager

        val lastKnownLocation: Location = locationManager.getLastKnownLocation(locationProvider)

        return LatLng(lastKnownLocation.latitude, lastKnownLocation.longitude)
    }
}
코드를 살펴보면 위치를 측정하는 프로바이더를 GPS로 설정을 하고, 위치 서버스 객체를 불러온 후, 마지막으로 업데이트된 위치를 가져오고 그것을 위도 경도로 반환합니다.
마지막으로 버튼을 클릭 하면 현재 위치로 이동하는 onMyLocationButtonClick의 코드입니다.
class MainActivity : AppCompatActivity() {

    private fun onMyLocationButtonClick() {
        when {
            checkPermissions() -> googleMap?.moveCamera(
                CameraUpdateFactory.newLatLngZoom(getMyLocation(), DEFAULT_ZOOM_LEVEL)
            )
            else -> Toast.makeText(applicationContext, "위치사용권한 설정에 동의해주세요", Toast.LENGTH_LONG).show()
        }
    }
}
전체 코드
class MainActivity : AppCompatActivity() {

    val PERMISSIONS = arrayOf(
        Manifest.permission.ACCESS_COARSE_LOCATION,
        Manifest.permission.ACCESS_FINE_LOCATION)

    val REQUEST_PERMISSION_CODE = 1

    val DEFAULT_ZOOM_LEVEL = 17f

    val CITY_HALL = LatLng(37.5662952, 126.97794509999994)

    var googleMap: GoogleMap? = null

    override fun onCreate(savedInstanceState: Bundle?) {
        super.onCreate(savedInstanceState)
        setContentView(R.layout.activity_main)

        mapView.onCreate(savedInstanceState)

        if (checkPermissions()) {
            initMap()
        } else {
            ActivityCompat.requestPermissions(this, PERMISSIONS, REQUEST_PERMISSION_CODE)
        }

        myLocationButton.setOnClickListener { onMyLocationButtonClick() }
    }

    override fun onRequestPermissionsResult(requestCode: Int, permissions: Array<out String>, grantResults: IntArray) {
        super.onRequestPermissionsResult(requestCode, permissions, grantResults)

        initMap()
    }

    private fun checkPermissions(): Boolean {

        for (permission in PERMISSIONS) {
            if (ActivityCompat.checkSelfPermission(this, permission) != PackageManager.PERMISSION_GRANTED) {
                return false
            }
        }
        return true
    }

    @SuppressLint("MissingPermission")
    fun initMap() {
        mapView.getMapAsync {

            googleMap = it
            it.uiSettings.isMyLocationButtonEnabled = false

            when {
                checkPermissions() -> {
                    it.isMyLocationEnabled = true
                    it.moveCamera(CameraUpdateFactory.newLatLngZoom(getMyLocation(), DEFAULT_ZOOM_LEVEL))
                }
                else -> {
                    it.moveCamera(CameraUpdateFactory.newLatLngZoom(CITY_HALL, DEFAULT_ZOOM_LEVEL))
                }
            }
        }
    }

    @SuppressLint("MissingPermission")
    fun getMyLocation(): LatLng {

        val locationProvider: String = LocationManager.GPS_PROVIDER

        val locationManager = getSystemService(Context.LOCATION_SERVICE) as LocationManager

        val lastKnownLocation: Location = locationManager.getLastKnownLocation(locationProvider)

        return LatLng(lastKnownLocation.latitude, lastKnownLocation.longitude)
    }

    private fun onMyLocationButtonClick() {
        when {
            checkPermissions() -> googleMap?.moveCamera(
                CameraUpdateFactory.newLatLngZoom(getMyLocation(), DEFAULT_ZOOM_LEVEL)
            )
            else -> Toast.makeText(applicationContext, "위치사용권한 설정에 동의해주세요", Toast.LENGTH_LONG).show()
        }
    }

    override fun onResume() {
        super.onResume()
        mapView.onResume()
    }

    override fun onPause() {
        super.onPause()
        mapView.onPause()
    }

    override fun onDestroy() {
        super.onDestroy()
        mapView.onDestroy()
    }

    override fun onLowMemory() {
        super.onLowMemory()
        mapView.onLowMemory()
    }

}
실행을 하게 되면 구글 맵이 나오게 됩니다.
예제 코드
https://github.com/Im-Tae/Blog_Example/tree/master/Android/Google_Map_Example
'알려주는 이야기 > 안드로이드' 카테고리의 다른 글
| 안드로이드 구글 지도 사용하기 - 3 [클러스터링 사용하기] (0) | 2020.06.06 |
|---|---|
| 안드로이드 구글 지도 사용하기 - 2 [공공 API 연동하기] (2) | 2020.06.06 |
| 코틀린 DataBinding 예제 (0) | 2020.05.04 |
| 안드로이드 STT, TTS 예제 (0) | 2020.05.02 |
| 안드로이드 SharedPreference에 Json값 저장 (0) | 2020.04.25 |
