안드로이드 뷰 페이저
뷰 페이저?
좌우로 스와이프 하여 view를 전환하는 AdapterView이다.
액티비티를 여러 개 만드는 것이 아니라 여러 개의 view들을 하나의 액티비티에서 사용합니다.
구현
- PagerAdapter를 구현합니다.
- getCount는 ViewPager로 보여줄 뷰의 전체 개수를 지정합니다.
- isViewFromObject는 instantiateItem에서 만든 객체를 사용할 것인지의 여부를 결정합니다.
- destroyItem은 ViewPager에서 뷰가 사라질 때 제거하는 작업을 합니다.
Do
뷰 페이저를 만들고 선택된 화면의 번호를 알려주는 것을 만들어 보겠습니다.
XML 작성
activity_main.xml
// activity_main.xml

<?xml version="1.0" encoding="utf-8"?>
<LinearLayout
    xmlns:android="http://schemas.android.com/apk/res/android"
    xmlns:app="http://schemas.android.com/apk/res-auto"
    xmlns:tools="http://schemas.android.com/tools"
    android:layout_width="match_parent"
    android:layout_height="match_parent"
    android:orientation="vertical"
    tools:context=".MainActivity">

    <TextView
        android:id="@+id/textView"
        android:layout_width="match_parent"
        android:layout_height="wrap_content"
        style="@style/TextAppearance.AppCompat.Large"/>

    <androidx.viewpager.widget.ViewPager
        android:id="@+id/pager"
        android:layout_width="match_parent"
        android:layout_height="match_parent" />

</LinearLayout>
main xml을 위와 같이 만들고
// view1.xml

<?xml version="1.0" encoding="utf-8"?>
<LinearLayout xmlns:android="http://schemas.android.com/apk/res/android"
    android:orientation="vertical" android:layout_width="match_parent"
    android:layout_height="match_parent">

    <Button
        android:id="@+id/button5"
        android:layout_width="match_parent"
        android:layout_height="wrap_content"
        android:text="Button" />

    <Button
        android:id="@+id/button"
        android:layout_width="match_parent"
        android:layout_height="wrap_content"
        android:text="Button" />

</LinearLayout>
// view2.xml

<?xml version="1.0" encoding="utf-8"?>
<LinearLayout xmlns:android="http://schemas.android.com/apk/res/android"
    android:orientation="vertical" android:layout_width="match_parent"
    android:layout_height="match_parent">

    <TextView
        android:id="@+id/textView2"
        android:layout_width="match_parent"
        android:layout_height="wrap_content"
        android:text="TextView" />

    <TextView
        android:id="@+id/textView4"
        android:layout_width="match_parent"
        android:layout_height="wrap_content"
        android:text="TextView" />

    <TextView
        android:id="@+id/textView3"
        android:layout_width="match_parent"
        android:layout_height="wrap_content"
        android:text="TextView" />
</LinearLayout>
// view3.xml

<?xml version="1.0" encoding="utf-8"?>
<LinearLayout xmlns:android="http://schemas.android.com/apk/res/android"
    android:orientation="vertical" android:layout_width="match_parent"
    android:layout_height="match_parent">

    <Switch
        android:id="@+id/switch1"
        android:layout_width="match_parent"
        android:layout_height="wrap_content"
        android:text="Switch" />

    <Switch
        android:id="@+id/switch2"
        android:layout_width="match_parent"
        android:layout_height="wrap_content"
        android:text="Switch" />

    <Switch
        android:id="@+id/switch3"
        android:layout_width="match_parent"
        android:layout_height="wrap_content"
        android:text="Switch" />
</LinearLayout>
뷰 페이저에서 보여줄 뷰를 3개 만들었습니다.
코드 확인
먼저 뷰 페이저의 전체 코드입니다.
// MainActivity.kt

class MainActivity : AppCompatActivity() {

    private val list: ArrayList<View> = arrayListOf()

    override fun onCreate(savedInstanceState: Bundle?) {
        super.onCreate(savedInstanceState)
        setContentView(R.layout.activity_main)

        list.add(layoutInflater.inflate(R.layout.view1, null))
        list.add(layoutInflater.inflate(R.layout.view2, null))
        list.add(layoutInflater.inflate(R.layout.view3, null))

        pager.adapter = ViewPagerAdapter()

        pager.addOnPageChangeListener(object: ViewPager.OnPageChangeListener{

            override fun onPageScrolled(position: Int, positionOffset: Float, positionOffsetPixels: Int) {
                textView.text = "${position + 1} 번째 화면 입니다."
            }

            override fun onPageScrollStateChanged(state: Int) {

            }

            override fun onPageSelected(position: Int) {

            }

        })
    }

    inner class ViewPagerAdapter : PagerAdapter() {

        override fun getCount(): Int = list.size

        override fun isViewFromObject(view: View, obj: Any): Boolean = view == obj

        override fun instantiateItem(container: ViewGroup, position: Int): Any {

            pager.addView(list[position])

            return list[position]
        }

        override fun destroyItem(container: ViewGroup, position: Int, obj: Any) = pager.removeView(obj as View)
    }
}
ViewPagerAdaper 클래스 살펴보기
먼저 ViewPagerAdaper 클래스를 살펴보겠습니다.
ViewPagerAdaper는 PagerAdapter을 상속받고 있고 getCount, isViewFromObject, instantiateItem, destroyItem을 오버라이드 하고 있습니다.
위 구현 부분에서 말했듯이 각각의 기능은 아래와 같습니다.
- PagerAdapter를 구현합니다.
- getCount는 ViewPager로 보여줄 뷰의 전체 개수를 지정합니다.
- isViewFromObject는 instantiateItem에서 만든 객체를 사용할 것인지의 여부를 결정합니다.
- destroyItem은 ViewPager에서 뷰가 사라질 때 제거하는 작업을 합니다.
getCount는 뷰가 들어있는 ArrayList인 list에서 size를 가져옵니다.
isViewFromObject는 뷰와 오브젝트가 같은지 확인을 합니다.
instantiateItem에서는 페이저에 뷰를 추가하는 작업을 합니다.
destroyItem에서는 뷰를 지우는 작업을 합니다. 여기서는 오브젝트를 뷰로써 지우겠다고 명시해줍니다.
onCreate 함수 살펴보기
private val list: ArrayList<View> = arrayListOf()View를 담을 ArrayList인 list를 선언해주었습니다.
list.add(layoutInflater.inflate(R.layout.view1, null))
list.add(layoutInflater.inflate(R.layout.view2, null))
list.add(layoutInflater.inflate(R.layout.view3, null))
list에 뷰 페이저에서 사용할 뷰들을 추가해줍니다.
pager.adapter = ViewPagerAdapter()만들어두었던 ViewPagerAdapter 클래스를 뷰 페이저의 어댑터로 지정합니다.

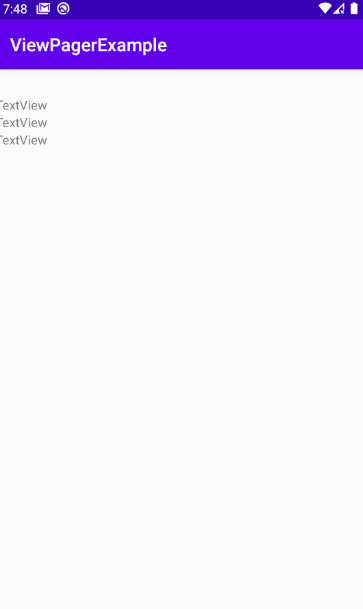

빌드를 하게 되면 위와 같이 뷰 페이저가 동작하는 것을 볼 수 있습니다.
뷰 페이저 이벤트 설정하기
마지막으로 뷰 페이저의 화면이 바뀌면 몇 번째 화면인지 알려주는 코드의 설명입니다.
pager.addOnPageChangeListener(object: ViewPager.OnPageChangeListener{

    override fun onPageScrolled(position: Int, positionOffset: Float, positionOffsetPixels: Int) {

        // 스크롤 효과가 일어나면 동작한다.

        textView.text = "${position + 1} 번째 화면 입니다."
    }

    override fun onPageScrollStateChanged(state: Int) {

        // state 값은 0, 1, 2로 3가지 이다.

        // 0 : SCROLL_STATE_IDLE - 종료 되었을 때
        // 1 : SCROLL_STATE_DRAGGING - 드래그 되고 있을 때
        // 2 : SCROLL_STATE_SETTLING - 고정 되었을 때

        // 0번째 페이지에서 2번째 페이지를 누르면 0과 2만 찍힌다.
    }

    override fun onPageSelected(position: Int) {
        // 선택된 페이지를 알려준다.
    }

})

예제 코드
https://github.com/Im-Tae/Blog_Example/tree/master/Android/ViewPagerExample